So I promised another owl post, here it is! My daughter decided she wanted to be an owl for Halloween this year (okay really I decided since I still can and it will probably be the last year I can). I thought it would be fun to try and make her costume. I normally try to convince all the kids to be part of a theme, because yes I'm dorky like that and like us to coordinate and I think themes are more fun. Since my three year old son INSISTS on being Captain America or Iron Man, and I'm over the whole super hero costume thing, I decided an owl might be fun. And by making one, it wouldn't be the same costume as all the others. I looked all over Pinterest for Owl costume tutorials and found a couple of cute easy ones that I used to pick and choose from. Here were two that popped up that were super cute!
 |
Check out her step by step directions on this cute little number over at:
http://alphamom.com/family-fun/holidays/last-minute-kids-owl-costume/
|
Here's another one that really helped me out:
(minimal sewing and a pillow case, add a few dozen
glue sticks and hot glue gun, even I can do that)!
|
You can check out her detailed info over at
http://www.5orangepotatoes.com/blog/2010/10/25/how-to-make-an-owl-costume-from-a-pillowcase/
|
Here is what I ended up doing:

First, I went and bought a yard of brown felt and three fabrics with different patterns that I wanted. I LOVE orange, pink and brown together so that's what I looked for at the fabric store. I already had the hot pink pillow case and hot pink and orange pom pom ball ribbon. I also already had the hot pink long-sleeved shirt and leggings for underneath, so this owl costume was super cheap to make (about $10 bucks!)! Then I cut a feather shape pattern and spent hours (no, seriously, HOURS) cutting many many many feathers. I was going to sew them all on, but then thought it would be sooo much easier to just hot glue them on. Since this will only be worn twice (for the preschool parade and trick-or-treating) hot glue it was! I lined up my feathers next to the pillow case and made a pattern and then just hot glued them in place. Oh yeah, I cut a hole for the head and arms out of the pillow case before glueing. I also folded up a hem to make the pillowcase dress the right length for my daughter. Normally, I would've sewed that too, but nah, hot glued that baby up too! Hot glue is the best!

The next step was the wings. I had Maddison lie down on the yard of brown felt and just cut out the shape around her.
Then you guessed it, laid the feathers out in my desired pattern and glued the gazillions of feathers in place. Also which took FOREVER (or so it seemed).
 |
Maddison added to my pattern on the left because of course, she needed to help make the costume.
|
 |
| Tada! The finally completed wings |
I wanted to add more detail so I glued that pom pom ribbon stuff to the top of the wings and and the bottom of the pillowcase dress. Then I took some material, made two straps for the inside of the wings to slide her arms in, and put a button on the top middle of the inside of the wing cape to attach to the dress. I had a few extra feathers and pom pom ribbon, so I hot glued them to an old trick-or-treating candy bag we already had. I mentioned I like things to match right?
The final part of the costume to do was the mask. Here's what I started with:
I also got a sheet of brown foam and cut more feathers for the mask. I'm not entirely happy with the end result of the mask, but hey, Maddison was... and that's all that matters!
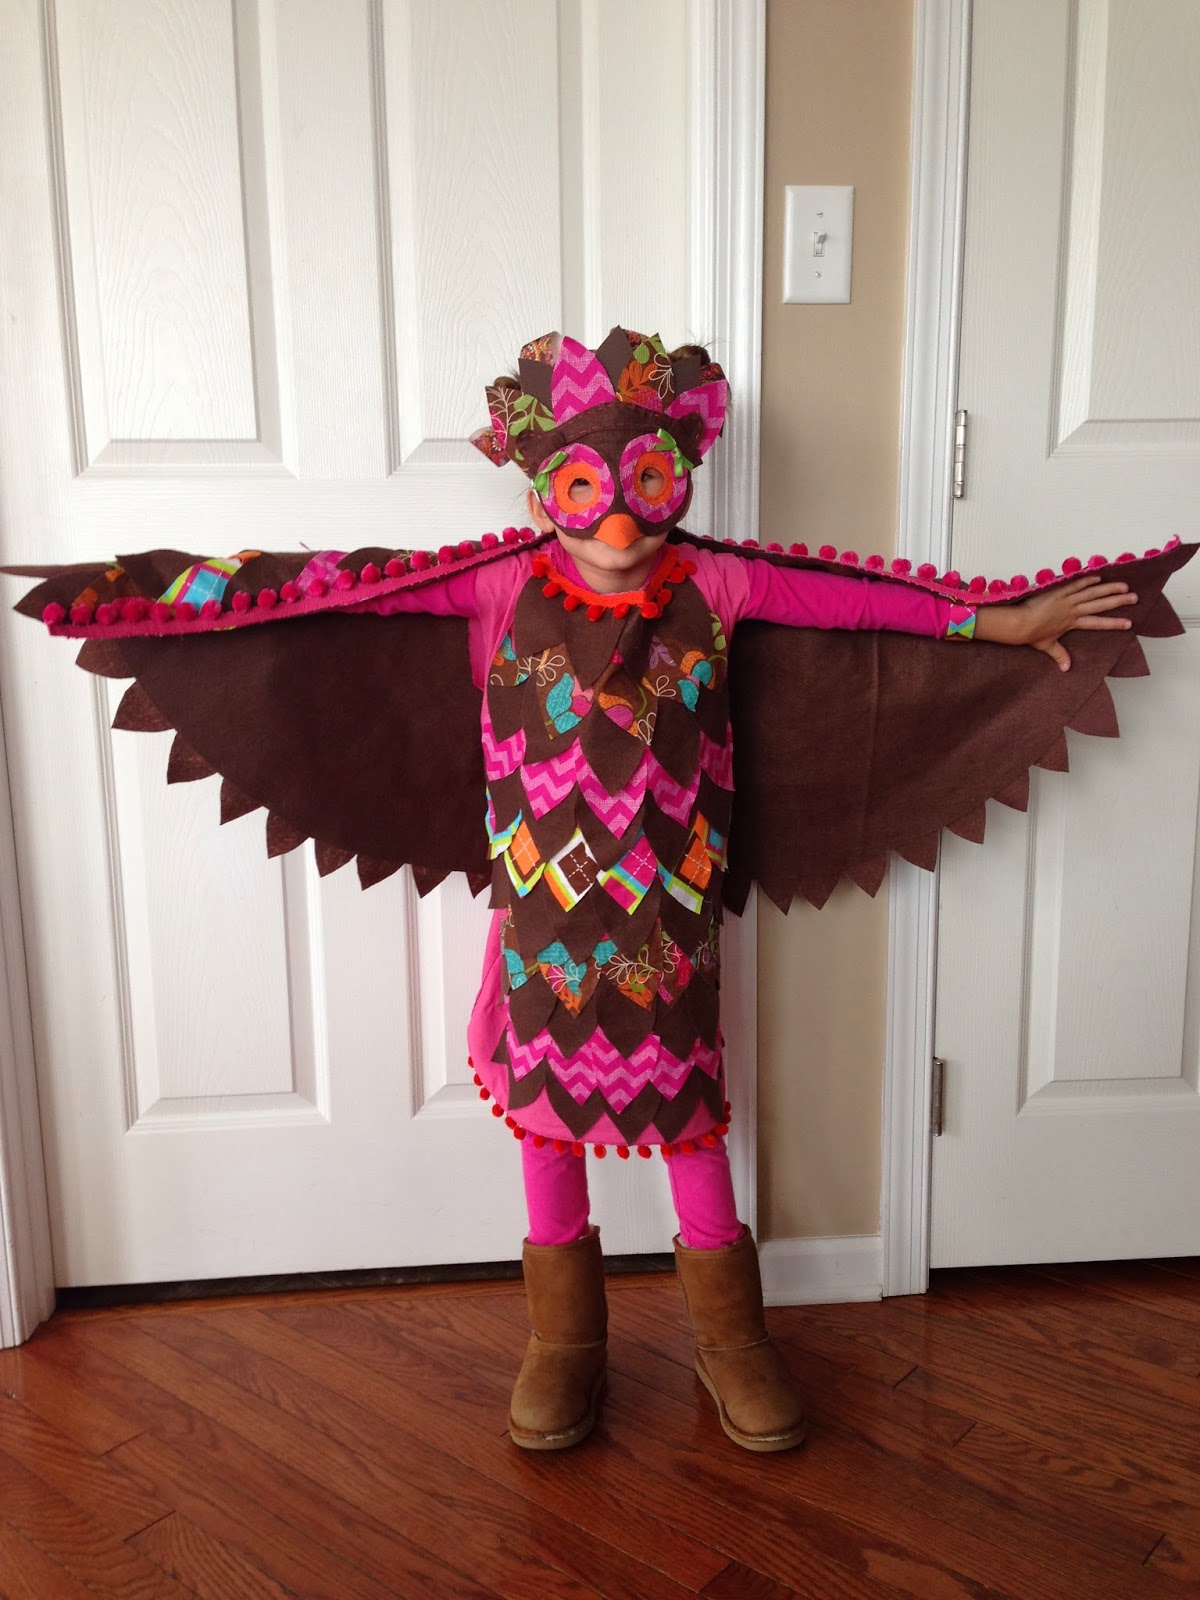
As you guessed, I hot glued everything in place. I did some stitching around the eyes and top of the head to make it "look" sewn. I feel like it looks more like that character in Madagascar than an owl, you know the king of the Lemurs, is it??... "I like to move it, move it." Yeah, you know the one. Anyways, here's the finished product:
 |
My little owl model
|
 |
| I just neeed to make sure the straps are tighter so she can actually see, lol |
 |
| I'm thinking about adding some tail feathers, but that would mean more cutting and glueing...we'll see! |
Anyways, there you have it! My first homemade Halloween costume. Super cheap, super easy, just a little tedious. All in all, it took me a solid day and a half to put the whole thing together. Not too terribly bad!!
Thanks for reading! If you enjoy reading about our Sassy little projects, PLEASE SUBSCRIBE TO OUR POSTS and like our Facebook page. You can do this at the very bottom of the page, by clicking on the link :) We'd be forever grateful!
Thanks a ton,
Jules